Wednesday, January 26, 2011

Simple Monograms

Our wedding ceremony will be held at an outside gazebo in a city park. Late last summer, I stalked a wedding that was setting up (and I plan to do this as often as possible this summer!) and took a few quick (and blurry) shots with my not-smart phone.


Although it's difficult to see in such a small photo, these people had one chair on each side of the aisle turned backwards, with a monogram initial perched on the chair. Theirs was done in moss, which was really cool. But I wanted a punch of color, so I started thinking about how I will do mine. I could have spent a ton of money buying the pretty purple or white flowers to make them elaborate, but I instead opted for a cheaper version.

I bought an E and a J, then painted them purple. The J wasn't very long on top, and looked smaller than the E, so I actually had to supplement it with some cardboard pieces that I just glued on to make it larger.


I used the same purple sheer ribbon I used to decorate my cardbox, and started wrapping the ribbon around the letters. I used hot glue to adhere onto the back and hold the ribbon in place. I ended up using a lot of ribbon, but I think they are funky and cute and will stand out against our white chairs!


These two monograms will later be moved to the reception site. Behind the head table, I am going to do some sort of garland (yet to be determined and therefore, blogged about) that stretches from one side to the other. I think I will hang these monograms off the ends.


Tuesday, January 25, 2011

Bling Bridal Shoes - I'm now a Bedazzler.

I've had some recent developments with my purple bridal shoes. Remember, they are these Rocketdog pumps:


As I blogged about previously, I was trying to figure out how exactly to bling them up. I purchased pretty clip-on earrings and plain shoe clips and thought they'd look amazing, but I quickly realized that shoe clips won't even attach my shoes! The knot on the top of the shoe  makes it impossible for the clip to stay on it -- it kept squeezing right off.

I certainly could have left my shoes the way they were, but I wanted to make them something unique and special. I decided to go with option #2: bedazzling.

I had already bought my hot-fix tool, which I would highly recommend if you are planning to do any sort of bedazzling! It makes the process super easy...it's my new favorite tool! I used 3mm clear hot-fix crystals to bling the bottoms of my shoes with the words "I Do". Then I felt they needed just a little more pizzazz so I also put two rows of crystals right on the bottom of the heel. I showed them to Jeff and he was a bit perplexed ("Who's going to see that anyway?") but he was also impressed with my bedazzling prowess.


I apologize for the poor photo quality, I took these with my non-smart phone!

Oh, I forgot to mention that I shopped at Gordman's last week and accidentally ran across the EXACT same pair of shoes as my pumps, except in a ballet-flat version! $10! I will wear the flats during the reception, for sure! I tried desperately to figure out a way to bedazzle these shoes...but alas, I put down my hot-fix tool. For now.


Source

Friday, January 14, 2011

Mock-Up DIY Pocketfold Invitations


Many years ago, a coworker of mine brought me an invitation to a beach wedding that she loved. She knew I was interested in card-making and the like, so she thought I'd also be interested in seeing the invitation. It was a simple photograph with a vellum overlay, on which the invitation text was written. I fell in love with that simple idea!

When I started thinking about my wedding invitations I knew I had to incorporate that. I also love pocketfolds. But being the cheapskate I am, I quickly realized pocketfolds were out of my price range. Then I ran into another invitation dilemma: 90% of our guests will be from out of town, and therefore would really benefit from a lot of information being included in the invitation. So I either had to do a pocketfold or I had to have a ton of random inserts, or rely on my guests going to our website for all the information.

Then, like a godsend, I found MsRitaliu's tutorial on WeddingBee.com that perfectly outlined how to make your own pocketfold. I immediately set to work on recreating it. I spent hours getting the sizes right, aligning the inserts (still need to do some work here - the little swooshy thing is not lined up on all of them, and I might just scrap that altogether), playing with fonts, printing mock-ups and cutting them and seeing how they all fit together. Then I started researching papers to use. All of this was accomplished during my workday (shhhh) and without that time, I don't know if I'd be even to the halfway point on this. It takes a lot of decision-making to do this sort of project on your own.


The back of the Directions insert, with a simplified map.


My favorite site that I found was http://www.paperandmore.com/. The other sites out there (cardsandpockets.com, lcipaper.com, etc.) were also helpful. I also needed to make sure my RSVP card was the correct size and weight so I did research with the USPS on that aspect.

At PaperandMore.com, I was able to order samples of every paper style I was considering. One thing I learned: pay attention to paper weights! Text paper weight is different than cardstock weight. 

I am going to make 180 of these babies! Here's a breakdown of the materials, sizes, and prices of everything I used (all paper from paperandmore.com):

1. Pearlescent Metallic Paper 81#  in Ruby Purple  - I chose text-weight paper instead of cardstock for its cheaper price (for the same look), its folding ease (their cardstock is actually really thick), and to reduce the final weight of the entire invitation (I want to keep it at a 44-cent stamp). The only downfall is I need to be much more careful with it. It will bend and get imperfections much easier than the cardstock version (you can see this yourself with the upper-right corner of the photo above).

Size of My Pocketfold - 6.25" high x 11" wide. The flap is 2" and the main part and pocketside are 4.5". The pocket is made from a piece of 3.25" x 5.25" (then measured 1/2" in from the three sides and folded under). Actual pocket space ends up being 2.75" high by 4.25" wide. I can cut 4 pieces from each page for the pocket.

Purchasing: 3 packs (100 sheets in each) @ 19.99 = $59.97.

2. Prints of our engagement pics from Snapfish - Over the course of a few months, I got most of these for free. Snapfish sends out great deals via email that you can snag if you are patient!

3. #29 White Vellum Paper - This is the site's most popular version of vellum. I put it through the laser copier/printer at work and it did not smudge ONE bit, and the print looks great!

Purchasing: 1 pack (100 sheets, I can fit two 4x6 overlays onto each printed sheet) @16.99 = $16.99

4. Bright White Linen 80# Text Paper - Using this for three of the inserts. It is thick enough to be substantial but doesn't make the pocket too full. Plus, it's cheaper than the cardstock version so I'm saving money. I'm also using this for the 1.3" square on the front of the invite with the monogram stamp.

Insert Sizes: Reception 4.2" x 5", Directions/Map 4.2" x 4.25, Information 4.2" x 3.5"

Purchasing: 3 packs (100 sheets each) x 9.99 = $29.97

5. Bright White Linen 80# Card Stock - Using this for the RSVP card insert. 80# cardstock is the lightest paper weight you can use to send as a postcard. Looking at all 4 inserts together, they all look exactly the same! You only tell the difference when you hold all the pieces. However, I think I'll need to get the RSVPs printed by a company as it seemed to smudge easier in the printer because of the thickness of the paper. This same card stock will also be used for our ceremony programs (more on this in a later blog).

Purchasing: Only need 1 pack for invites, but will purchase 2 packs to cover the ceremony programs and other signage I may need. 2 packs (100 sheets each) x 15.99 = $31.98

6. Bright White Linen A6 Envelopes - We are only using one envelope and no inner envelope. This is partially me being a tree-hugger (it just gets thrown away anyway) and also to cut down the final weight.

Purchasing: 4 packs (50 envelopes each) x 10.99 =  $43.96

7. Pearlescent Metallic Paper 81# in Onyx Black - Used for the belly band. It is 3/4" and I can cut 11 from each piece of paper. It is also used for the black 1.5" square on the front monogram piece. I can fit 35 on a page!

Purchasing: 1 pack (100 sheets) x 19.99 = $19.99
* I will end up with 77 extra pieces of black paper. I only "need" 23 pieces but I figure I can use this black paper for some other stuff (I'm thinking rehearsal dinner invites). To purchase 23 individual sheets of paper like this from a store will be approximately $13, so it's definitely worth it to just get the extra paper.

8. Silver Brads - I bought these from Michael's (in the scrapbooking section) to fasten the vellum onto the photo. They were under $2 for a package of 100, if I remember right. I used a hammer and a nail to punch a hole in them first, then pushed the brad through and opened up the back.

9. Double-Sided Tape -  I bought some on sale at JoAnn's. It is being used to adhere the photo (after vellum is attached with the brads) to the pocketfold. In my mock-up I used a glue stick, but herein lies another problem with NOT using cardstock: you can see all the glue marks when you turn over the invitation.

10. Glue Dots - Using a glue dot to attach the belly band to itself.

11. "F" Stamp - I bought this awhile back from http://www.stampxpress.com/ for $22.99. It is a self-inking stamp that is really easy to use and it looks great on the linen text paper.

Total PaperAndMore.com Cost: $202.86 + $3.99 (shipping) = $206.85

Estimated/Rounded Cost of Other Items Bought: $35

Final Estimated Cost for 180 Invitations: $282

Ahem, that's $1.60 an invite! Hooray me!

This is going to be a HUGE undertaking -- the most painstaking and time-consuming project of my entire wedding. I plan to enlist the help of a few lucky bridesmaids, and I hope to be able to do all of the actual pocketfold-making during my maternity leave. The rest will be easy!


Bridal Bouquet


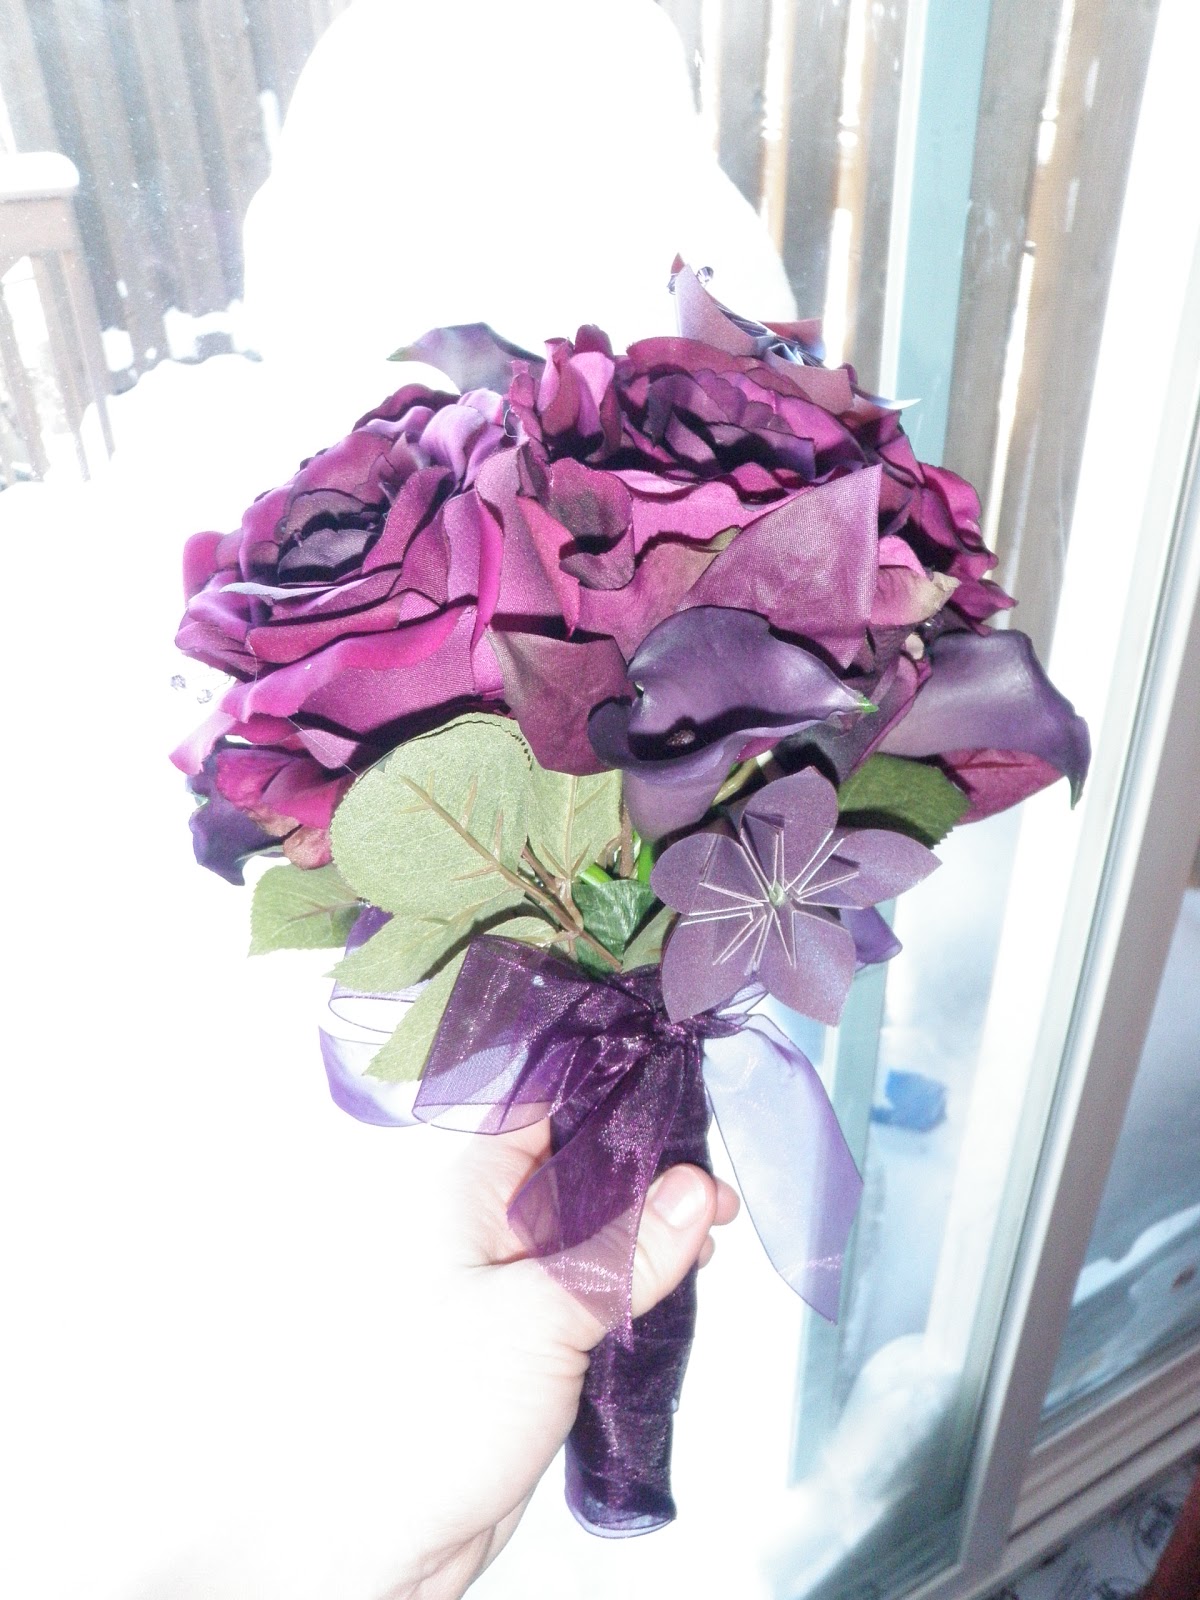
I have slowly but surely been working on a few DIY projects over the past weeks. I finally got all my materials together to make a mock-up of my bouquet. I actually ended up liking the final product so much that it will indeed be my bridal bouquet! Here's a breakdown of approximations of what I spent and used:

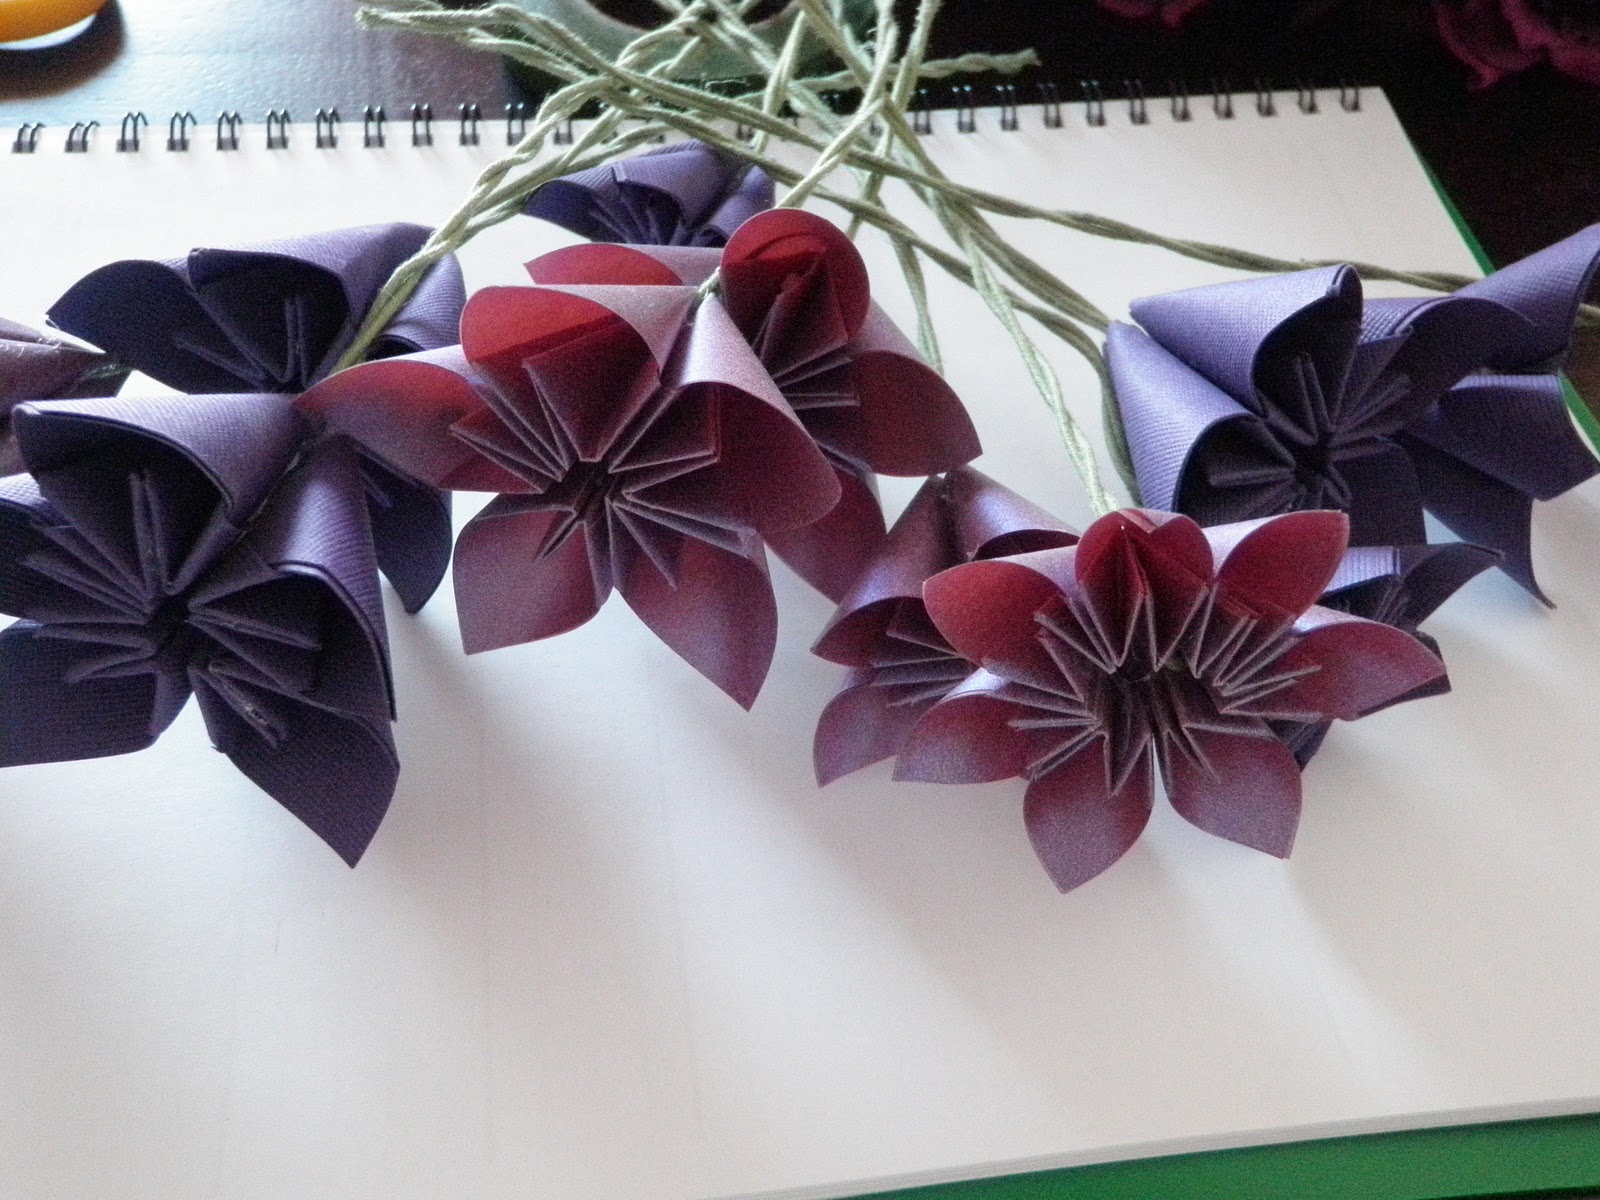
Paper Kusudama Flowers

I spent a few hours folding paper flowers. I bought a thicker, linen-styled dark purple cardstock and also an iridescent vellum (Hobby Lobby, I believe they were $0.59 and half off at the time).  I followed this tutorial.

Trade-offs with the different paper styles: The vellum was MUCH harder to work with as it was slippery, and required me to hold the pieces together longer while the hot glue dried. (You can see in the photo the one near the bottom right is less than perfect. It wasn't working the way I wanted it to and I ended up using 6 petals instead of 5!  I figured it'd add variety). But the card stock was really thick and made my fingers hurt from folding! In the final bouquet, I didn't end up using the cardstock flowers because they looked cheap and not very classy. I'd recommend spending the money on a thinner and prettier vellum or other paper. The flowers I made range from 2" squares of paper for each petal to 3" squares, because I wanted a variety of sizes. I glued in a wired floral stem into the middle of each. I'm still debating on "filling" the middle of each with a gem, but I'll decide later.

Cala Lilies

I bought these at Hobby Lobby months ago, to use for the boutonnierres, and they were only about $1.50 each. I thought I'd buy some larger sized ones for my bouquet, but I was not impressed with the prices and look of the large ones I've been finding. I attached a wire floral stem to 6 of these with floral tape to make a longer stem that would reach into the base/handle of my bouquet.


Open Roses

I got these on clearance at  Hobby Lobby at the end of the fall season. They were a little on the pinker side of purple but I knew they'd go perfectly with other shades of purple! And they do! I cut off the greenery so they were single flowers before putting them into the bouquet.


Bouquet Jewels


Using jewelry wire and extra swarovski bicone beads (the same ones I used to make the bridesmaid earrings), I made sparkly bouquet jewels! I just twisted one bead on, then two on each side. I then twisted a length of wire down and twisted the wire around the floral stem, to make more of a base for the bouquet jewels. I just made sure there was enough length of silver wire so you wouldn't see the green floral wire.

Putting It Together

This was my first time ever using floral tape or making any sort of bouquet. I learned that floral tape is some really cool stuff -- but it is also pretty fragile. You don't need to pull it very hard to get it to be tacky. Once I had the bouquet pulled together in my hand the way I wanted it, I had my fiance hold on to it so I could tape the stems together. I must have wrapped that sucker about 100 times!

After wrapping the base/stem and taking a look, I felt like I needed a little more fullness. I didn't feel like going to buy more flowers and taking it apart. Instead, I looked at my kitchen table and saw the pile of greenery that I'd cut off the roses, and attached them towards the base of the flowers. It made it 10 times better.

I simply used purple irridescent ribbon (the same ribbon I used on my card box) to wrap the base of the stem and tied two pretty bows on each side. I LOVE the way it turned out! It goes perfectly with my purple shoes, too.

Now, I've begun folding paper flowers in a pearly-white color. All six of my bridesmaids will carry bouquets that match this, except in white/cream.


Tuesday, December 28, 2010

How to BLING my shoes?

Exhibit A: My purple Rocketdog pumps


Exhibit B: The clip-on earrings that I found for about $3, and proceeded to break off the clip part.


The problem: How to fix these clips on to the shoe -- preferably in a non-permanent manner.

I'm wondering if I can buy a metal shoe clip and adhere these to it. I found a seller on eBay that sells a plain shoe clip, but can't seem to find anything else.

Beadinmama's Listing

Any ideas, anyone?


Tuesday, December 14, 2010

Saving $$$ on Photography

We REALLY lucked out with both our engagement photos and finding a wedding photographer. I was starting to look at photography packages and was so disappointed in the outrageous costs. I get it: you've got to hire someone good who will listen to what you want, do what you want, and will produce photos of your special day that are more than you ever expected -- after all, this day is only supposed to happen once in your life. But there's got to be a way to combine those things with a cost you can afford to live with, right?

If you are really stuck, contact a local college or university (heck, even a high school) for a budding photographer who can give you what you want for the price you need. I know that my old high school art teacher occassionally photographed weddings for people he knew, and they were beautiful. I was about to go this route when I started asking around, and....I lucked out!

I met someone who was a stay-at-home mom who had just started her own photography business on the side. She charged us $30 for the session fee for our engagement pics and then a simple $4 fee per photo for complete rights. She gave me those photos on a disc in a high-resolution format so that I could make large prints if I wanted. It was exactly what we wanted -- we didn't want anything too fancy, but we were super impressed with her work. She's no longer working for her own business (keep reading). These are some of my favorite engagement photos:

The bad news (for us, good for her) was that she got hired by a larger photography company in the area as an assistant. I was going to go ahead and book the company until I found out that the pricing packages started at $3,000. There's no way we'd meet our $10,000 budget with those prices, no matter how much I love their photography. I had to regretfully say good-bye to our newfound photographer.

One day a few weeks later, an old friend popped up on Facebook. I remembered that he's a photographer in Minneapolis, which is four hours from our wedding location. I went out on a limb and asked him if he'd be willing to shoot our wedding. He was pumped! I was pumped!

Not only have I always loved his photography style, but he offered up his friends and family package. He will bring an assistant with him, which means TWO photographers. He's including a "fauxtobooth" -- a simple black background where our guests can take as many shots as they want for us to have as a keepsake. They'll be available for download by us or our guests after the wedding. (I'm going to gather some costumes/props for this area to make it really fun for our guests.)

Wedding. Photo. Heaven.

You can check him out at http://www.kylesmithphoto.com/!


Friday, December 10, 2010

Purple Bridal Shoes

Since I saw my inspiration photo of the bride with the purple shoes and bouquet, I've been on the hunt for the perfect purple pumps. I found some awesome shoes but they were either too costly (I wanted to stay under $50) or they seemed like they'd KILL my feet after only minutes wearing them.

My friends suggested that I find a pair I love in a dyeable brand and then get them colored how I want. I was about to make up my mind that I would do just that, when I searched eBay one last time.

I found these Rocketdog pumps:


EXACTLY what I'd been looking for! The best part was that I won the bid at $4 and spent $5 for shipping. For 9 dollars, I was willing to take the risk that these shoes wouldn't fit or wouldn't be everything I'd hoped for. I would never have bought these if they had been in the $30-range.

When I finally saw the package at my doorstep I tore right in and tried them on immediately. It was heaven. I pranced around the house in my purple shoes and 5-month pregnant belly the whole night. Jeff was a bit clueless when I exclaimed, "They're my WEDDING shoes!" He said, "Aren't they um....the wrong color?" he whispered, as if he was going to burst my happiness bubble. Absolutely not! was my explaination, to which he just shrugged.

Now I have a bit of a DIY dilemma. I love these shoes the way they are...BUT I think it'd be adorable to bling them up, like what some of  these WeddingBee members did. I don't think I would ever put rhinestones on the entire shoe, but I'm considering doing a design on the toe.

My other option could be a shoe clip. I'd like to make my own...but I'm not sure it'd work on this type of shoe. Any suggestions?


Wednesday, December 8, 2010

Tutorial: Cascade Earrings

 DIY Cascade Earring Tutorial


Supplies
Chain, Swarovski 4mm crystals in dark purple, gray 6mm pearl beads, and standard headpins
I also used sterling silver earring findings that I already had in my jewelry-making box, plus three tools (pliers, snips/wire cutter, and round-nose pliers).


Instructions
1. Put a crystal bead on a headpin.

2. Holding the bead between my index finger and my thumb, I used my thumb nail to manually bend the wire to one side.

3. Using round-nose pliers, pinch the wire at the bend, and wind the wire around the nose to make a loop.


4. Cut the excess wire off and you are left with a loop. Don't worry about closing the loop yet. Also, don't worry if your loop looks funny (this one was actually the prettiest loop I've ever made...the rest are not this pretty!). I also realized at this point that I should have purchased shorter headpins so there would be less waste.


5. Repeat this process for the remaining beads you need. I used 11 crystal beads and 6 pearls (per earring).

6. Cut approximately 1 inch of wire. I have 13 links of chain on mine. (Your first try you may want to add more chain -- you can cut it off later.) Attach the earring finding to the end of the chain.

7. On the first chain link closest to the finding, put the first pearl on. Close the loop with the pliers.

8. Attach a crystal loop to the same loop that holds the pearl. (On the first chain link you now have two beads, one pearl and one crystal.)

9. On the next chain link, attach a crystal loop.

10. Repeat down the chain. I drew up a VERY CRUDE version of my pattern.

11. Make the final pearl be on a chain link by itself. Then space out two chain links before you add the final bead. I did this because I wanted it to create an upside-down teardrop effect, and also because the crystals are smaller than the pearls. The final crystal was getting lost in the pearl if I didn't do that.


12. Done!

Total Time Per Earring:
About 25 minutes. I know that is almost an hour per pair...which seems long. That's how long it's taking me right now and I'm hoping to become a master at this and pare it down to 15-20 minutes. But I think it's worth it!


Suggestions:
I'd recommend purchasing full-size jewelry tools as opposed to the mini-tools they sell. The mini tools are great for small projects but they can really hurt your hands when you are doing projects as detailed as this.
You could also use a variety of beads. I think if I were to start over I might use a clear Swarovski crystal. You can also use a variety of sizes. I've seen some that use larger beads at the top and smaller beads towards the bottom (or reverse). Also, you could use a pretty bead cap on the end of the pearls to add more detail.


50 Cent Bridesmaid Earrings

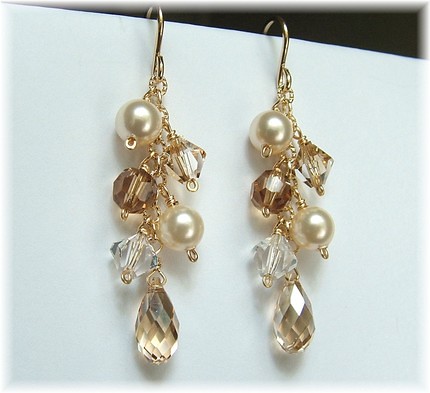
My goal in making my bridesmaid's earrings was first to make something that most of them would wear again. I fell in love with cascade-style earrings like these:

 
Pearl Cascade Earrings 

 
I've made earrings before but never this intricate of a style. I did a quick search on how to make cascade earrings and found these instructions. The methods used were ones that I've used in other jewelry-making endeavors so I wasn't scared.

 
Here's the breakdown of the costs and where I found my materials:
  • 72" chain purchased at Michaels for $2.99
  • 190 gray Crystazzi 6mm pearls at Michaels for $2.50 (on sale)
  • 400 dark purple Swarovski crystals on eBay for $5.00 (including shipping)
  • Sterling silver earring findings: I already had these in my jewelry-making kit
  • Tools: I already had these as well!
Total Cost of Materials: $10.49

 
Now let's do some more math. I like to figure out exact costs so I know how much I really saved. Also, I will probably end up using the crystals and pearls in other projects (thinking of the crystals for my tree-branch centerpieces and for bouquet jewels).
  • Chain- using 12 inches (2 inches per girl/1 inch per earring) = $0.50 total
  • Gray Pearls - using 72 total (12 per girl/6 per earring) = $0.94 total
  • Swarovski beads - using 132 beads (22 per girl/11 per earring) = $1.65 total
  • Sterling silver earring findings: free!
  • Tools: free!


Actual cost (that I forked over) for ALL bridesmaid earrings = $3.09
Actual cost for each bridesmaid/each pair of earrings = $0.52

 
WOW! Seriously? It costs me about 50 cents a girl? I guess I could have used more expensive materials, but really they look lovely the way they are!

 
See my next blog for the complete tutorial on how I made these earrings.

Monday, December 6, 2010

Letting My Bridesmaids Choose Their Own Dresses

After deciding that my bridesmaids would wear eggplant/deep purple, I was on the hunt for a dress that would compliment them all. I spent weeks emailing my bridesmaids (i.e. being bridezilla) about this dress or that dress. My sister (maid of honor) was the only one kind enough to really respond to most of the crazy emails and ideas. Everyone else just said, "Whatever you want! You're the bride!"

But that's not the response I wanted! I don't want to be the only one responsible for picking out a dress for 6 other people to wear! Of course I wanted them to save money as well.

Then I thought I'd decided on the dress that would flatter each figure. I was excited about the $135 price tag (if bought online) as well. It is Impression Bridesmaids style 1731, pictured here on the right:

BestBridalPrices.com

But then my wheels started turning...I just can't get them to stop sometimes. I thought about my two large-chested bridesmaids and how they would probably loathe wearing a strapless dress. I thought about how different my 4'10" bridesmaid would look next to my 5'9" bridesmaid. I thought about how I'm not even wearing a strapless dress, so why should I make my bridesmaids do the same?

So I settled on a new idea: My bridesmaids would all wear the same color and fabric and have dresses of the same floor-length, but I would let them choose their own dress. I chose Alfred Angelo's brand (because it is widely available for my bridesmaids to try on across the country) and I asked that they each pick out two of their favorites so that I could make the final decision once I see them all.

Four of my girls have picked their dresses so far -- only two more to go! Here's what my wedding party looks like so far (all photos courtesy of AlfredAngelo.com):